This is a good plugin to use when you have a dedicated server, or even a VPS. That’s usually when you’re more vulnerable. But even with shared hosting, sometimes your server isn’t well protected and your website could be under attack. You can tell if someone is trying to hack you with this plugin. It’s called WP-Ban.
WP-Ban allows you to block or ban a specific IP address, an entire IP Range (like maybe an entire internet servic eprovider). WP-Ban is a plugin that will ban people from looking at your website and show them a custom message.
You could even ban people from a specific region or country; so long as you know their IP addresses.
WP-Ban works well with others
I discovered WP-Ban while using another security oriented plugin called: Limit Login Attempts which locks out the login screen for a period of time, after a predetermined number of incorrect login attempts. You can install both Both WP-Ban and Limit Login Attempts directly from your dashboard since they are available for free from the WordPress.org repository.
So the way I made WP-Ban work in conjunction with Limit Login Attempts is that Limit Login Attempts collects the ip addresses and every so often, I go and clean up the logs from that plugin.
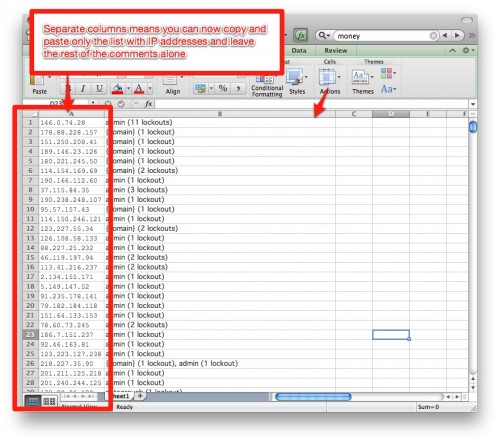
As I clean up the logs, before I clear the logs I copy the list of IP addresses that have been trying to hack into my website and paste them in WP-Ban. This will give me the IP addresses that I need to ban.
There is a trick to doing this because the format of the list from Limit Login Attempts is different than the format that WP-ban wants. The trick here is to copy the list from your browser but paste it into Excel. This will make the two different columns be in two different columns and then you can just copy and paste the IP addresses only.
WP-Ban says this is its job:
Ban users by IP, IP Range, host name, user agent and referrer url from visiting your WordPress’s blog.
Once you separate the data, or even before, you could sort the data and eliminate any repeated IP addresses (if they exist). This process could take a little while but at least you end up blocking the ip addresses that are attacking you.
You need to feed WP-Ban
If you’d like, you can add my own list of IP addresses that I ban across all my sites, this may be a good starting point. This list is put together from my own experience and different sites. Use at your own risk. You can download it from my Free Stuff section.
Once you have a list of IP Addresses to ban, then just copy and paste this list into WP-Ban. Just one IP address per line and save the settings. From then on you’ll have blocked those IP addresses from accessing any part of your website.
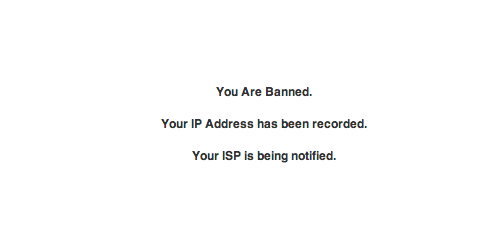
If someone or something visits using one of those IP Addresses and comes back to your site, they’ll be shown a message. You can customize the message to be shown.
I am assuming most of these are not people that accidentally got banned, but instead these are active bots. They’re computers that don’t even look at websites. This is why I make a very simple text only page that warns them, just in case the script kiddie (bot operator) is actually checking to see if they can log in.

Simple text explaining that they are banned.
Once you made a banned rule, you must deactivate it before the IP address, or custom group of visitors can have access to your site again. Be sure not to ban your own ip by mistake.
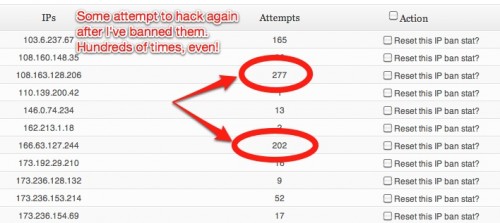
Once you’ve done this a couple times and maybe even just after a few days, WP-Ban will also show you a list of all the ip addresses and how many times they have tried to access your site.
For me, you can see that the same visitors will try dozens of times to see if they’ve been allowed access, but thanks to WP-Ban, they simply get that message to go away.

And then after I’ve added the IP Addresses, I’ll clear this log as well.
That’s pretty much how WP-Ban works. You can also ban certain type of browser or device by looking at the user agent banning options. Even the source of the visitor, like if you wanted to ban someone coming from a specific website, you could do that as well.


