Once you have a new WordPress website, you may want to create a blogpost or a page to give your visitors some information. Creating a blogpost or a page is very similar.
To create a blogpost follow these steps
- Login to your website
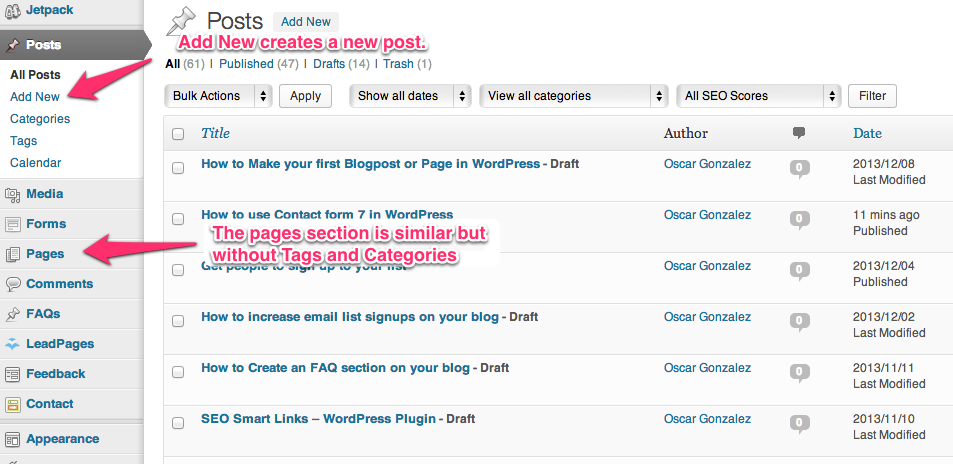
- On the left hand side, click on Posts, then click on Add New, you can then fill in the title of your post and then write the blogpost in the big text section below the title. You will have controls similar to other programs in your computer like Microsoft Word so you can format the text like you want it.
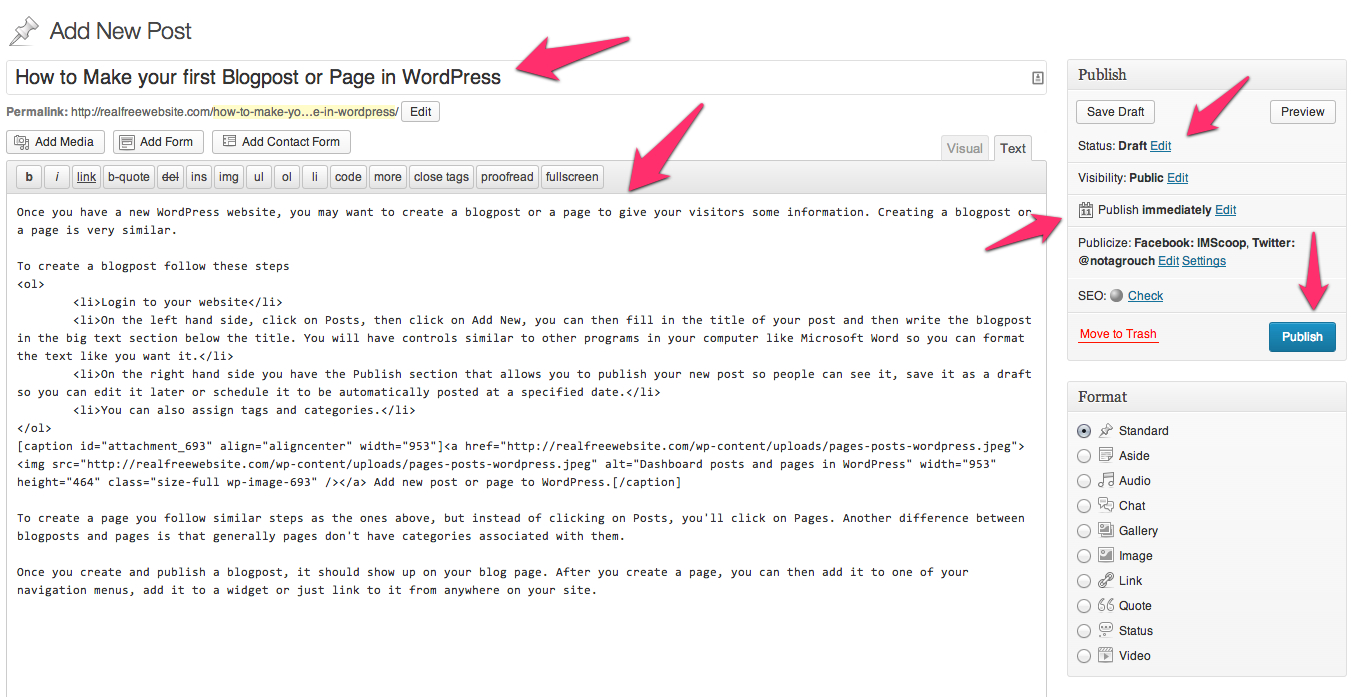
- On the right hand side you have the Publish section that allows you to publish your new post so people can see it, save it as a draft so you can edit it later or schedule it to be automatically posted at a specified date.
- You can also assign tags and categories.
You’ll notice that you have a “Visual” tab and a “Text” tab. All that means is that Visual is a lot more like you would see in apps you are familiar with. The formatting toolbar looks a little different and you have a few more visual options. Text is your blogpost more or less in HTML code so you can make very fine adjustments to your blogposts. Notice the screenshot below shows the text version of this very blogpost.
To create a page you follow similar steps as the ones above, but instead of clicking on Posts, you’ll click on Pages. Another difference between blogposts and pages is that generally pages don’t have categories associated with them.
Once you create and publish a blogpost, it should show up on your blog page. After you create a page, you can then add it to one of your navigation menus, add it to a widget or just link to it from anywhere on your site.


