One of the big mistakes you want to avoid is using really big images on your website. As a rule of thumb, you don’t want to upload original sized pictures to your website.
When you take a photo with your digital camera for example, or even your smart phone, the file size of that photo tends to be way bigger than you need for a website. A lot bigger. This will slow down your site, annoy your visitors and you won’t get any love from Google.
The best thing you can do is to re-size the photo to the size where the photo will be displayed, and reduce its size to something that will load fast.
It seems like a lot of work to do this, does it not? And you may be thinking, does it really matter? and why doesn’t WordPress do this for me automatically?
Yes, it seems like a lot of work, but it’s part of being a blogger or maintaining your own website. In the long term, this is time well invested for several reasons. When it comes time to back up your site, the back up is smaller and easier to work with and it takes less time and resources; all of that are good reasons. Besides the benefits of saving time and resources when backing up and working with your files, smaller file sizes will load faster for your visitors. People like fast loading websites. Google loves them too!
So here’s a fairly good approach I recommend to working with images.
When possible, make the image the exact size for where it will be used. For example, lets look at a recent post: 20 Reasons to have a website. You’ll notice there are images throughout the post. Specifically, there are 2 different size images. One is a small size, almost thumbnail size and the other is larger and spans across the width of the entire post.
I specifically made those smaller sized images exactly that size I needed so that when they load for a visitor, they are really small and they load fast. I don’t intend that anyone will be able to click on them to make them larger, that’s not their purpose so I didn’t make them any larger than that. The smaller images are 250px wide by 150px tall. These all should be between 10k to 25k in file size.
The larger images are also made exactly that size, you can’t make them larger. I used those to highlight a specific point and to give a little bit of visual diversity.
Generally, I try to keep images to these file sizes:
- Small, like a thumbnail or so, less than 35K
- Medium, maybe for a full size on a post but not full screen, less than 100k
- Full size, like a photograph or lots of detail, less than 200K
When dealing with photos and images, things can get tricky and complicated quite fast. There are dimensions, ratios and file sizes.
Dimensions are the actual measurements of the image, like 250pixels wide by 130pixels tall.
The ratio is what determines if the image is portrait-based (taller), landscape-based (wider) or square.
And the file size is how much space the file uses in your computer or web hosting account.
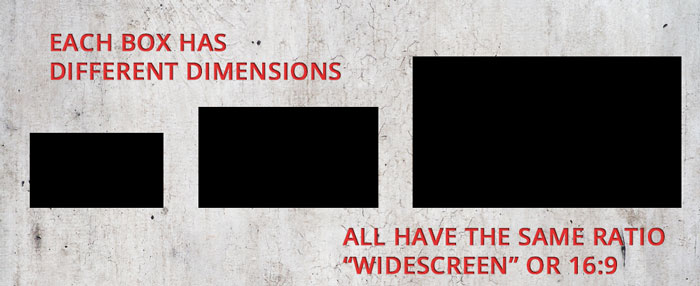
The ratio is like your TV, it can be widescreen (16:9), or like the standard older format television (4:3). Meaning, no matter what size one side is, the other size will be the same ratio, but it will be the size of times the other side of the ratio. For example, if you had a wide-aspect 16:9 image that is 160pixels wide, it would be 90 pixels tall, and if you double the size, then it would be 320pixels wide by 180pixels tall. The ratio is always 16:9, even if the image dimensions change.

The dimensions are the exact pixel size of the image like explained above, you get to determine this to be whatever you need it to be for your purpose. Examples are like the ones I mentioned above, 250px by 130px, or 1920px by 1080px that would be for a wide screen tv with 1080p resolution.
The file size can be really really big even if the dimensions don’t seem to be that big. And sometimes your computer will show you an image that seems to be the right size but it’s actually much larger, your computer just shows it to you in a way that it fits your screen. This is why it is important to check your file sizes so that they’re not too big.
Unless you know what you are doing, NEVER upload images from your camera without processing them. Try to use iPhoto, Photoshop, or another application to make the size more appropriate. The photos that come directly from your camera, without processing them are too big almost every time.
You can get an idea of the file size you can expect (more or less) with this calculator. It’s a Megapixel Calculator. For example, the link takes you to a 1920×1080 pixel size image. Notice the file size for a full quality JPEG image is about 453k.
That’s still more than double the size of what I recommend. So to add another wrench to the mix, besides ratio, dimensions, and file size, there is compression & quality. I’ll cover those in an upcoming blogpost. But generally if you’re working from an original image, the human eye cannot distinguish the difference between about 60%-75% of quality, especially on the web.
This means that having a full size 1920px by 1080px image at 100% quality, you could reduce its file size without reducing its dimensions by saving it at 60% quality. Then you should be able to achieve 200 – 250k file sizes.
Additional reading and resources:


